Tools
The 3D model of the Borgia stele was made through photogrammetry, which is a process of taking multiple photos from different angles to create a computer model of an object. The photogrammetry program used to generate the model of the Borgia stele was Agisoft Metashape. The 3D model of the Sandalbinder was based on a pre-existing model from a 3D file site MyMiniFactory.
To work with the 3D models, we used Blender 2.83. Blender is a free, open source software used for 3D modeling, graphics, and animation. We learned how to use the software using tutorials by Blender Guru.
I found Blender to have a steep learning curve. We spent much of the first two weeks of the project learning how to use its basic functions. Even after going through the BlenderGuru donut tutorial, which took several hours even when I skipped part of it, I feel like I’ve barely skimmed the surface of what Blender can do. Working with the model of the Borgia stele was really helpful in getting to know the program because I was problem-solving on my own without relying on a specific tutorial. Now that I’ve passed the intimidating barrier for entry to use Blender, I’m hopeful that I can continue to use and develop the skills I’ve learned during this project. – Mira
Digital reconstruction
The digital reconstruction of the Sandalbinder and Borgia stele had three major steps: creating (and simplifying the models), UV unwrapping the models, and then coloring them using Blender’s texture paint function.
Seam marking and UV-unwrapping
UV unwrapping is a process of marking off discrete parts of the model so they can be colored separately. This marking is done along “seams”, the straight edges of the faces.
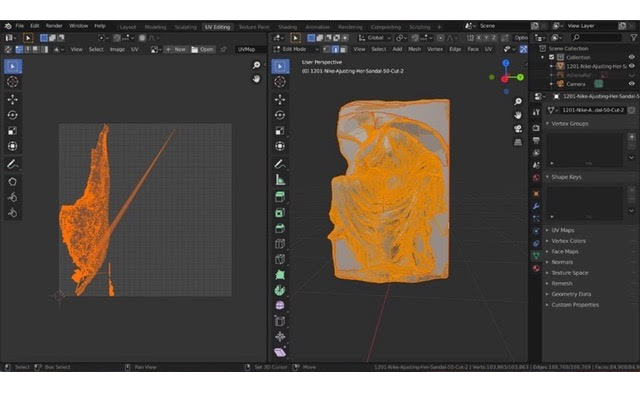
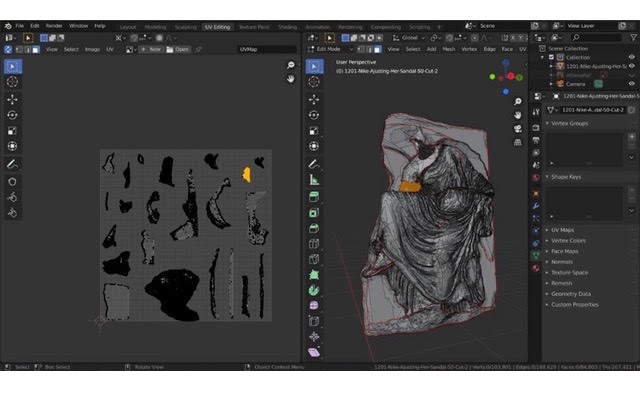
Seam marking and UV-unwrapping for the Sandalbinder were the most difficult parts of the reconstruction for me. The top image is the product of having a lot of hidden unmarked seams, especially seams behind the knees and the shoulders. However, I appreciate having learned this technique as it made it easier to paint the different areas without fear of overlap of colors. – Vimbai
Choosing color
We colored the models using Blender’s texture paint function. To get the specific colors, we used pigment samples from ColourLex and painted them on as stencils. To learn more about the pigments we used, visit About the Pigments.